

My Remote Teaching Station
For most of my training career, I have delivered courses to audiences in the same room. I have always favoured local delivery because the experience is far better for all. Coronavirus has made that view irrelevant for now; delivery has to be remote.
I made myself feel better by building a remote teaching station.
I haven’t yet thought of a snappy name for it. I’m open to suggestions. I’m still developing the station, but I think it is at a position where it may be worth sharing.
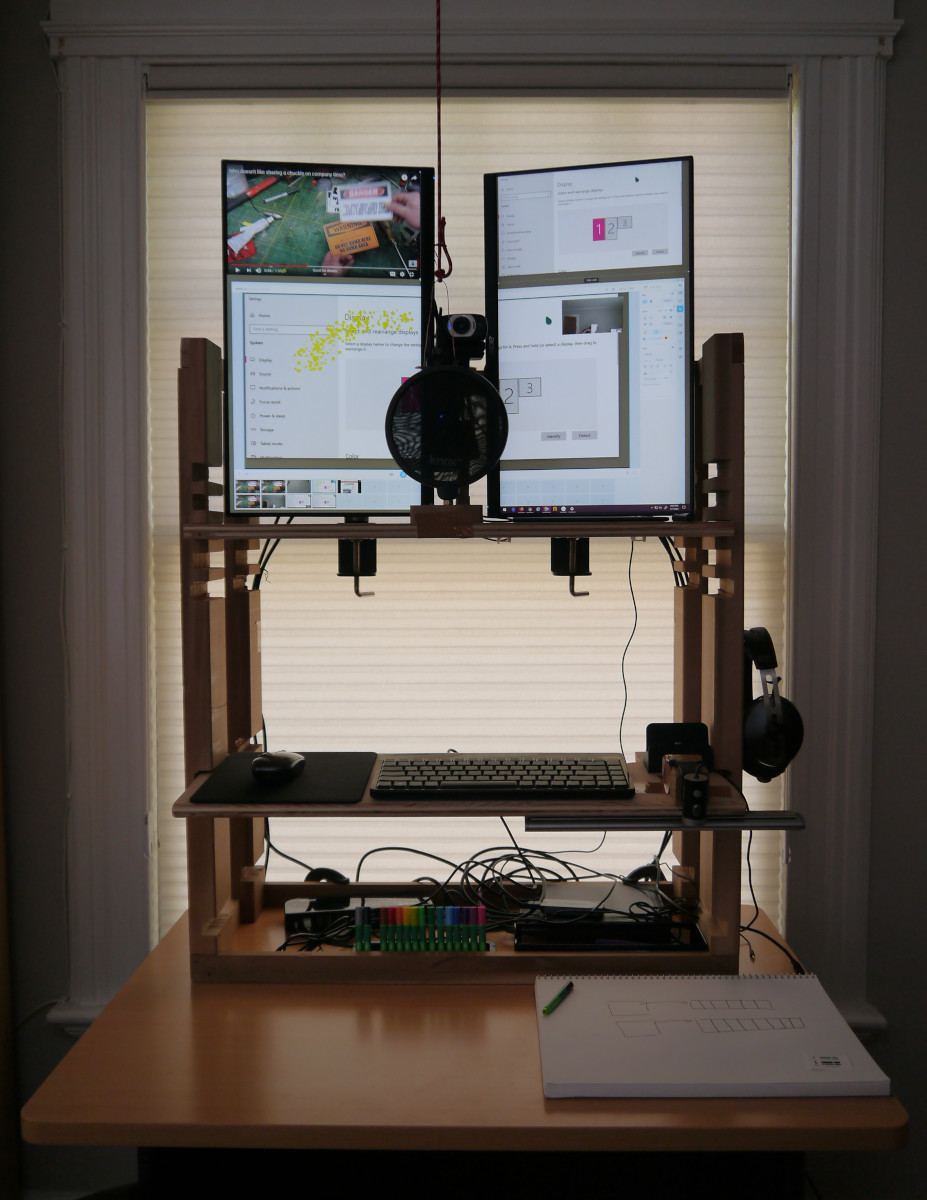
Remote Teaching Station
The station sits on top of a regular, small desk (held firmly by some clamps). I knew that I needed a good light source, so I positioned it in front of a window with a diffuse shade. I’m very, very fortunate in that I had this window, and I have a table saw and had some spare wood from an earlier project.
I teach standing up. That’s partly about energy and partly to avoid back pain. I built the station so that I could lower it to teach seated. To do so, the keyboard shelf is removed, and the keyboard and mouse are put on the desk. The monitor shelf is moved to the where the keyboard shelf was. That’s the way it was built, but I have never lowered it in practice. Originally the microphone was attached to the monitor shelf, and I didn’t have a drawing area, so moving it was easier. The microphone is now suspended to prevent environmental noise transmitted through the frame.
Microphone and Camera Closeup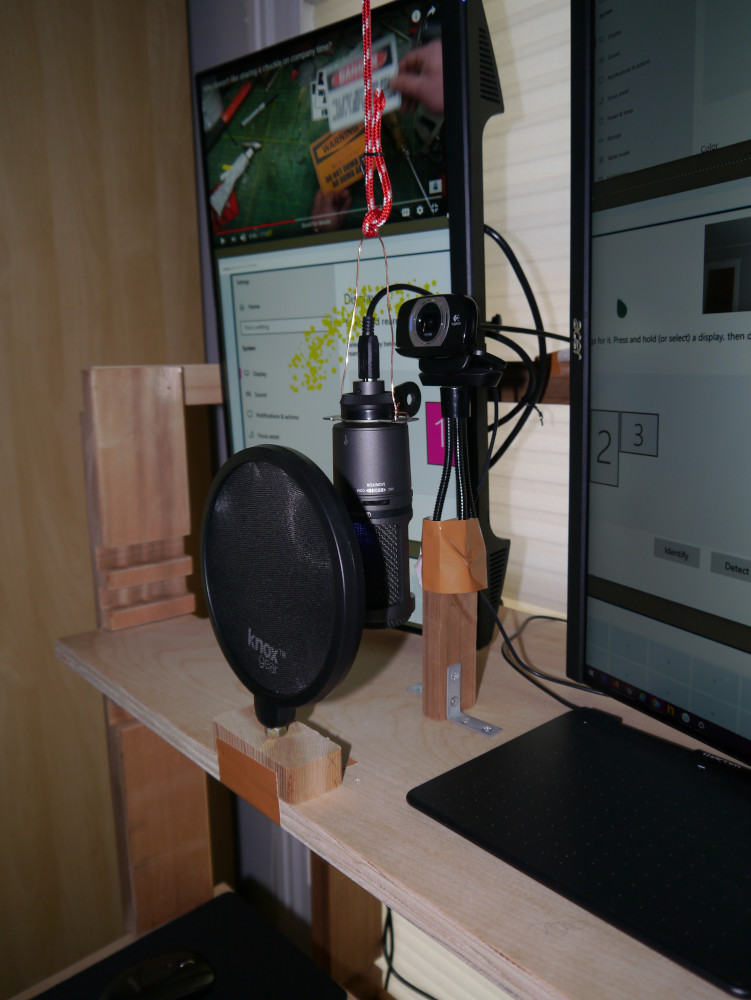
The camera is not that important. The microphone is. The day it looked likely that Coronavirus might trigger quarantines, I placed an order for a better microphone (Audio-Technica AT2020USB+). I’m no audio expert (I would welcome suggestions about what I am doing wrong), but this set up has given me excellent audio. The microphone is suspended just in front of the camera. I hacked together a yoke from a light fixing. The copper wire is only just out of the camera’s frame. I bought the pop filter with the microphone, and it came on a boom. That got in the way of the monitor, so I made a stand from a cutoff piece of wood. Note the highly professional choice of brown duck tape! The position of the microphone supports teaching into the camera.
Screens and Virtual Displays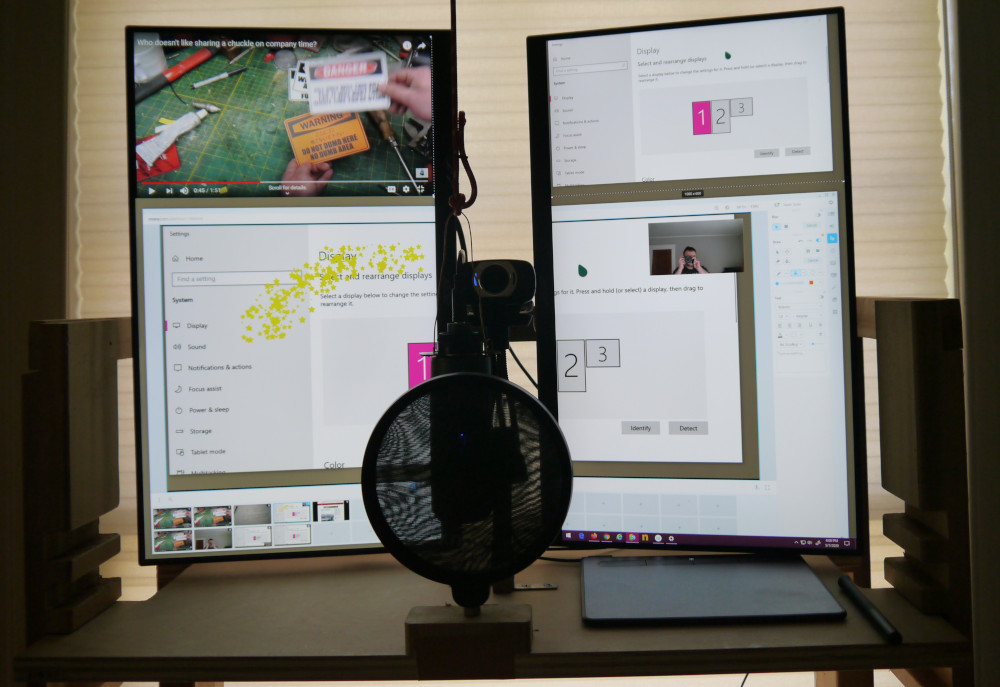
Why two screens? Firstly, you need space. Consider all of the things that you might need to be able to see quickly:
- The presentation material
- The video conferencing software
- The video source management software
- An RDP session to a client’s computer
Could it be done with one large screen? Maybe, but the gap allows more natural light to reach me. Also, hardware can pass through the gap. There was a bigger driving concern - ‘full screen’. You should be full screen when using PowerPoint, Google Slides, or whatever is used for your presentation material. It’s distracting if attendees can see the application’s controls. But going full screen in a single monitor would obscure everything else, including the conferencing software. It turns out that there are at least two other ways to work around this problem.
Even with two screens, it would be ideal if I could create a logical area on the screen and declare that to be a display. I didn’t find a perfect way of doing this. Virtual Display Manager is the best I found. It tricks some software (Chrome and PowerPoint being two important ones) into constraining full screen to be just a logical region. Look at the top of the left monitor. That’s YouTube running full screen in Chrome. I can use that region of the screen as a video input a program like ManyCam. It doesn’t work for all programs. Firefox, for instance, still wants to expand to the size of the monitor. If you’re curious, the YouTube video is from the magnificent AvE (viewer discretion advised, but you will learn a lot!).
The other approach requires adding a third physical display that feeds into a capture card. If you look at the top of the right monitor, I have the display properties open, and you can see that there are three displays. The third display is provided by a USB dock that has a DisplayLink device that outputs HDMI. The HDMI goes straight into the HDMI capture card that I couldn’t use for my camera! The HDMI capture card presents the captured signal as if it was a camera. This makes it awkward for doing things in that display, because you need to look at the camera feed rather than a screen, and moving the pointer there can be counter-intuitive. So far I have been able to use just virtual displays, but I have the third display as my backup plan for when I need to use software that cannot be convinced to go full screen within a region.
This picture has the best view of the Wacom tablet that I can use for drawing digitally.
It also shows that I have altered my mouse pointer to make it more obvious (it looks like a green teardrop). I found that some pointers, such as inverted, would not be shown by the video conferencing software at all. Although it can’t be seen in the pictures, you can turn on an option to show the cursor when you press CTRL. If you turn this on a series of concentric circles are drawn around the pointer, and they can be used to draw attendees’ attention.
The bulk of the screens in the screenshot is taken up by ManyCam. ManyCam combines multiple video sources into a single virtual camera that can be used as the input for video conferencing software. ManyCam is a commercial product; there are open source alternatives, such as Open Broadcaster Software. There is no particular reason that I chose ManyCam other than it does what I need with a reasonable UI and is reasonably priced for a piece of software I use professionally. The main part of the ManyCam window, as shown above, is the output from the virtual camera that is the input to the video conferencing software.
Here are some of the features that I have found particularly useful:
- Picture in Picture — The main view can be the training material with me in a rectangle in the corner. I wouldn’t expect any of the attendees to be actively watching me, but having the visual there feels much more conected than having a disembodied voice.
- Hot Keys — ManyCam allows you to create preset video combinations and swap between them using globally set hot keys. I can switch between different video sources easily. In my presets, I have some that are only different in the position of my rectangle. If it’s blocking I can shift it quickly without needing to go to the ManyCam application.
- Overlay Timers — When we break for a lab, I can display a countdown timer (or clock) over the preset.
- Overlay Drawing — You can draw over the top of the preset if you need to add things to a diagram (or glasses and moustache over the trainer of course). The tools are fairly basic, but that’s a perfect choice because you can’t be faffing when live. The picture shows some stars that I added for no other reason than to show the effect. The tablet is great for doing this kind of drawing.
- Overlay Text — Basic announcements can be made this way. As an example, some video conferencing software we were using would get overloaded at a certain time of day. I could leave a message in my video output that people would find as soon as they reconnected. It typically was something along the lines of “Video problems mean were taking a break”, and I would also overlay a countdown timer so that they could see when we were hoping that the problem would be resolved.
- Resolution and FPS Reduction — I don’t need to send 4K 60fps. Instead, I send a lower resolution less frequently.
ManyCam has other features, such as ChromaKey, which I haven’t had a real opportunity to use yet.
ManyCam Presets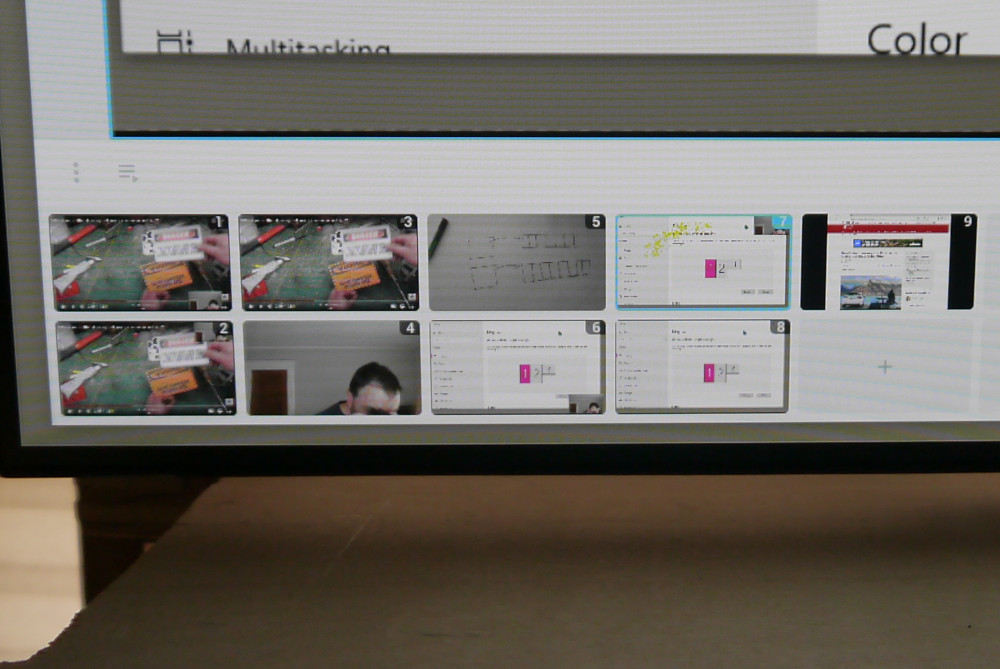
Diagram Camera and Keyboard Shelf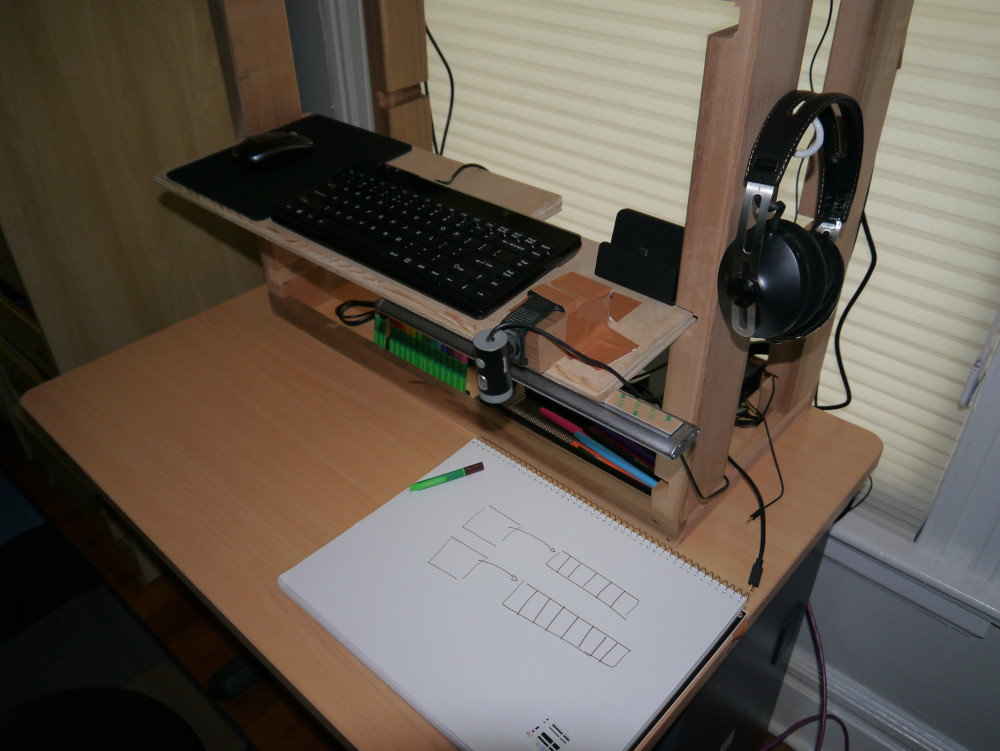
In the bottom corner of the drawing pad is a home-made attempt at an autofocus target. The Microsoft Lifecam has worked great as the family webcam (I have to return it at the weekend), but as the diagram camera, it tends to try refocusing too often. I hoped the AF target would provide something continually in shot that would fix the focus. It didn’t work for me, but you might have more luck. I have ordered a manual focus webcam.
The keyboard uses, I think, membrane switches. It’s certainly not a mechanical keyboard which is too clicky even with red switches. I found that it’s tough to find a membrane keyboard that’s ’ten key less’.
The mouse is Bluetooth. I mention this merely because Bluetooth is a good option here to leave some of the USB ports free. I would have had a Bluetooth keyboard, but I couldn’t find one I liked that was also quiet and small.
Hanging on the right are my headphones. If you’re presenting, you must wear headphones to prevent the microphone from picking up the speakers. They’re Bluetooth so I can move my arms around freely without snagging on a wire. There are two significant wires underneath the headphones. A USB cable to keep them charged, and a wired connection that can be plugged in if the battery is discharged. The headphones easily complete a day’s training on a charge, but there’s always a chance that I forgot to charge them the night before.
Computer, Dock, and HDMI Capture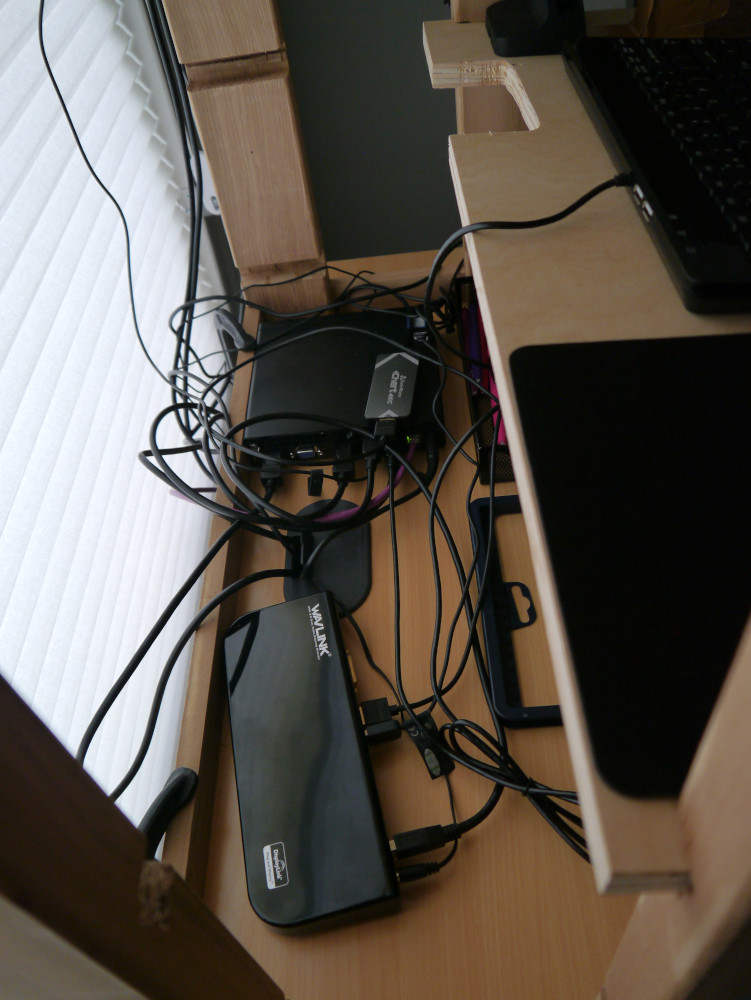
At the bottom of the screen is the USB dock. Its main purpose is to provide the third display. The HDMI cable comes out of it, and into the HDMI capture card which is sitting on top of the computer. It attaches through the computer’s USB C port at its front.
Steampunk?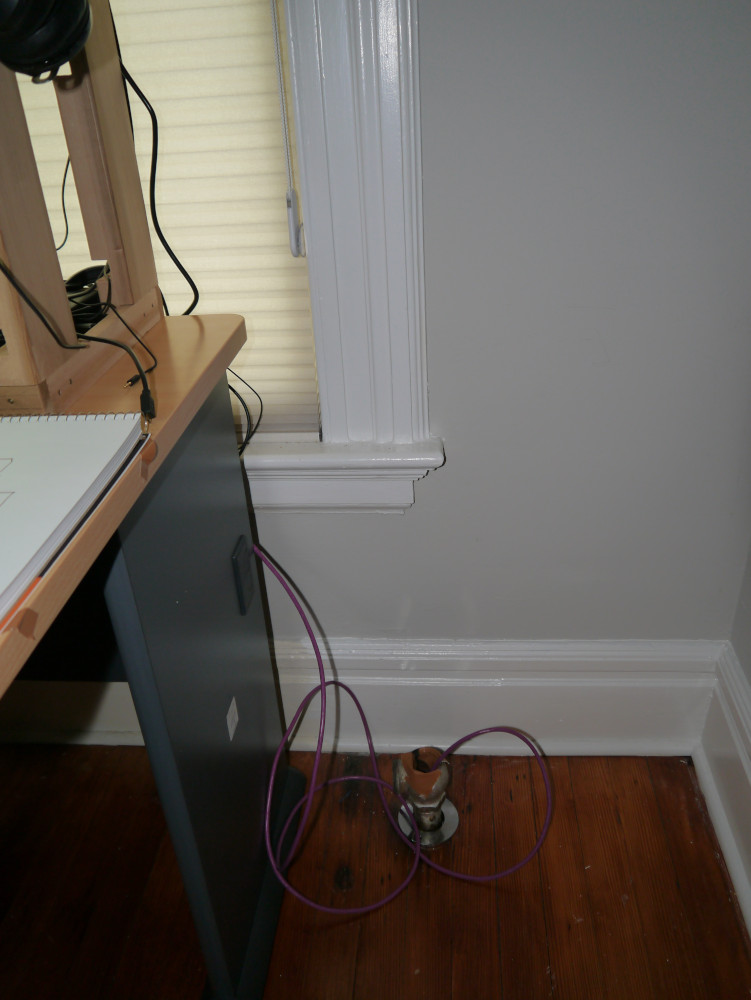
The remote training station is still evolving as a project. I am considering sound-absorbing tiles around the station. I have a green screen but haven’t worked out how to mount it. I’d like it to be double-sided so that I can choose between a plain background and the green screen.
Summary
I built a remote teaching station to improve the teaching experience for both myself and the attendees. It cannot replicate the desirable features of local training, but it can lessen the undesirable ones of remote training.