

Teaching Station: OBS Setup
OBS is a great piece of software, but setup can be involved. This post describes my current set up for the Mk III teaching station.
Open Broadcaster Software (OBS) is an essential piece of software if you wish to have control over what is seen by attendees. Without it you would be left switching cameras in your video-conferencing software and having no, or limited, ability to do things like picture-in-picture, a lower third, timers, freeze frames, etc.
There are alternatives to OBS. I started with ManyCam, and that worked well. However I reached the limits of its extensibility and flexibility and so moved to OBS. I have also used XSplit Broadcaster but ran into some issues with crashing and odd behaviour with its Stream Deck plugin. I liked it, but returned to OBS when I changed my graphics card.
Output
Remote teaching happens through video-conferencing applications (VCAs) such as Zoom, Google Meet, etc. You need to get the output of OBS (I’ll assume OBS, but the same applies to ManyCam and XSplit) to the VCA. It usually is easy, except for a couple of wrinkles. OBS has a virtual camera output which can be used as an input to the VCA.
You should be aware that not all VCAs honour your aspect ratio. One VCA I have worked with is neither 4:3 nor 16:9, opting for some middle ground, clipping off the horizontal edges on my output. Yet, the image it shows me is not clipped!
Your VCA might also, without you knowing, compress in a way that is unsuited to slides, making the text on the slide fuzzy. This can also depend on the recipient’s network connection, but I have also had it when everyone had a good network and plenty of CPU available. If this happens, then there is another possibility if you have output monitoring set up (as described next). The output monitor displays the output that is sent to the virtual camera. You can ask your VCA to capture that screen. If you have picture-in-picture of something dynamic, then it might be laggy, but I think this is the only option. Beware your camera in this situation! Some VCAs will continue to send the video from your camera if it controls the camera. You won’t see your nose picking, or look of horror at being asked the same question five times, but the attendees will.
Alas, audio output does not come out through OBS’s virtual camera. I usually have my microphone go straight to the VCA. This has worked without problem so far.
Output Monitoring
I have one monitor that always displays the output of OBS. A similar device on stage is known as a confidence monitor. It is reassuring to know what the output is; it eliminates concerns about what the attendees can see.
This can be set up by creating a ‘full-screen projector’ of the current view in OBS.
Output Monitor and Picture-in-Picture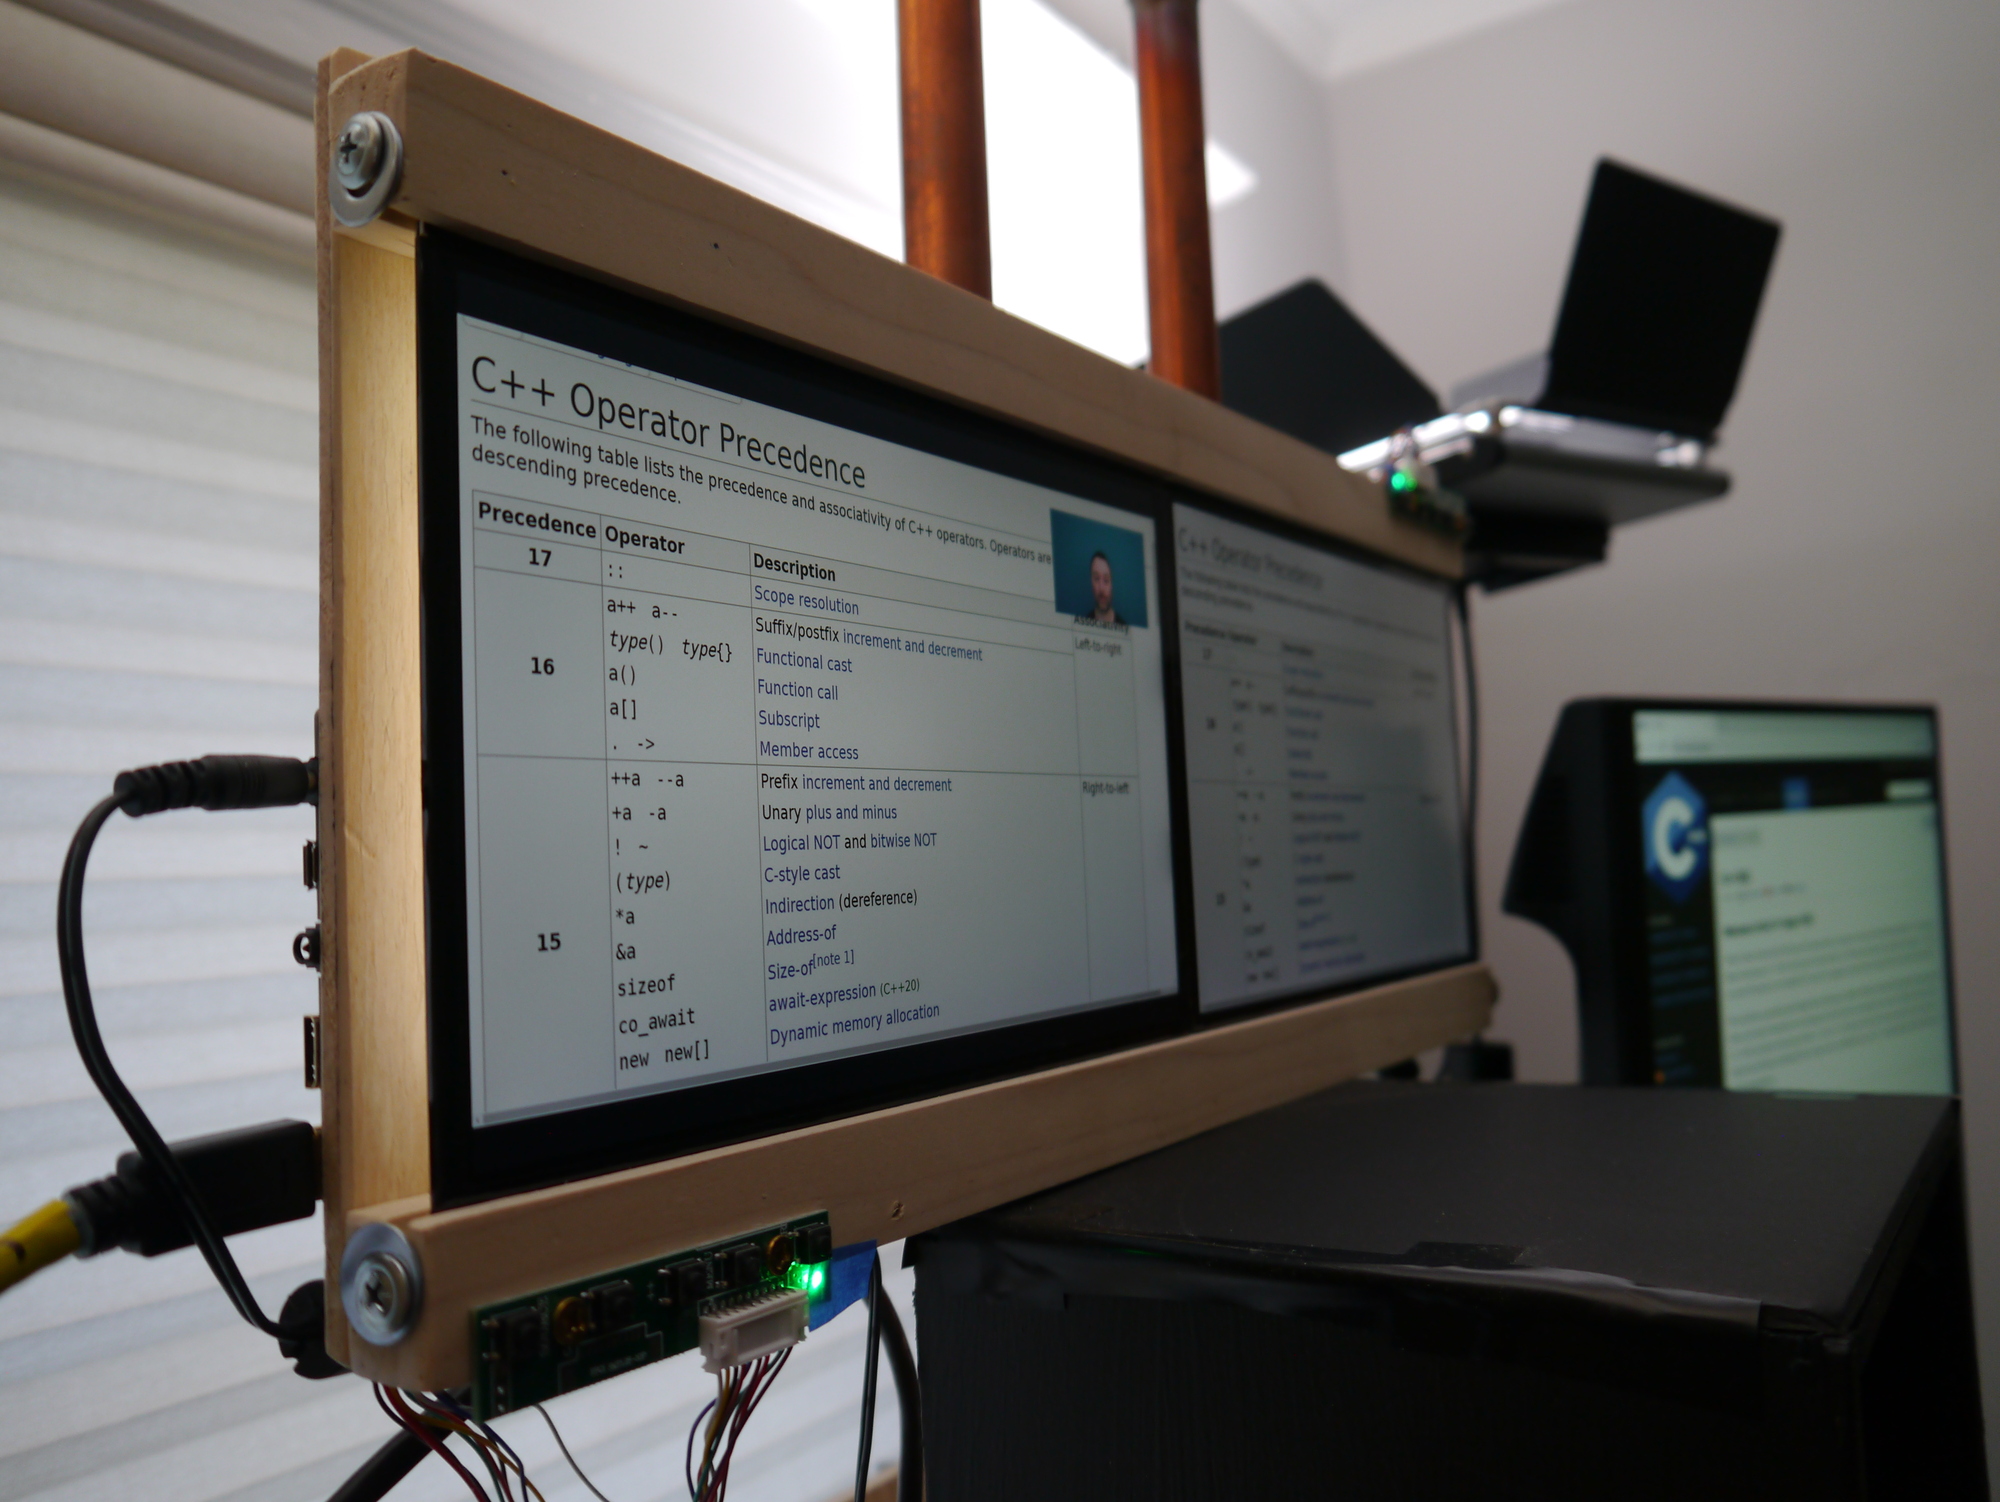
Input
I have the following video inputs:
- my main camera in the teleprompter,
- the diagram camera from the physical diagram area,
- capturing the full-screen presentation monitor,
- capturing a region from the monitor used for RDP,
- capturing the Sketchbook window for digital diagrams,
- a blank screen,
- and a test card image.
There is a corresponding scene for each of these inputs. The scene has picture-in-picture and overlays added which are explained later.
A button is set up for each of these scenes in the Stream Deck. Transitioning between scenes is easier with the Stream Deck and doesn’t require the focus to change to OBS.
Filters
Each video source can have filters applied. There are two main filters I use: green screen, and freeze filter.
The main camera has filters that convert green, or some other colour into transparent. Sitting underneath the camera’s image is the background image that will show through the transparency. I don’t often use this. It has, so far, been reserved for formal situations that require the client company’s logo or imagery. I think I can do a lot more with the green screen, but I also think that people are a bit fatigued with the effect.
The cameras and capturing inputs each have a freeze filter that allows me to freeze the video, so a single frame is shown repeatedly. I usually use this when the attendees are in labs, possibly freezing the output of the region captured from RDP. They will continue to see the frozen capture, perhaps with my main camera being live as a picture-in-picture. They can see that I am still there and moving, but my RDP screen is now not showing the current state. If at any time, you are worried about what the attendees are seeing - output monitor!
Picture-in-Picture
I have seen several presentations where the slides are shared, and the presenter narrates them. This works but is far from optimal. It is better to have both the slides and the presenter visible in one place. Typically this is done by providing a smaller picture of the presenter at the top right or bottom right of the screen. Using OBS, you can move yourself around so that you’re not obscuring something on the slide. You can see an example of this in the photo above that shows the output monitor.
Picture-in-picture (PIP) is also useful for maintaining context. When drawing a diagram, I can have the slides we were just looking at present on the same screen. Attendees don’t have to work to keep details in their head. In addition, I can show the main camera while drawing which is useful when you’re explaining bits in the diagram, just remember to turn it off when drawing unless you want attendees to see the top of your head. You will find out if you have a bald spot (freeze frame!).
The following scenes are all capable of picture-in-picture:
- diagram camera,
- full-screen capture,
- RDP region capture,
- and sketchbook capture.
The things that can be displayed picture-in-picture are any of the sources above, but not itself. In addition, the main camera can appear as a PIP in two forms.
One is a regularly positioned mini view of the main camera. Although I had plans to allow jumping about preset positions using the Stream Deck, I’ve abandoned those for now and move the PIPs using the mouse. The other view of the main camera, the floating camera, had not been fully set up at the time of writing. Its position will be controlled by the joysticks from a gamepad that are attached to the teaching station’s shelf (photo). I have had a lot of fun occasionally floating my head around while presenting. I’ll admit, I’m thinking of this weather sketch from The Day Today. The sketch is SFW, but The Day Today is generally not. I’m not floating around a weather map, of course, its code that we’re reviewing. It makes a nice change to be able to position yourself next to the code and actually point to the issue. The gamepad controller, coupled with the teleprompter, should allow this to be done without breaking eye contact. I don’t think that this should be used too often, but for a code review, you will get multiple chances to use it for the first time with each attendee.
Overlays
Three overlays can appear on some scenes:
- a clock,
- a countdown timer,
- and a lower third.
The clock is a simple but effective lua script. Follow the instructions for setting up a script, and associate with a text source, and you’re good to go apart from the styling.
The countdown timers are used during labs to make it clear how much time is remaining. I didn’t find a suitable solution that runs entirely within OBS. Instead, I use My Stream Timer. This is a separate application to OBS and writes the time text to a file. Within OBS a text field is set up that is bound to the file; when the file changes, the content of the text field change. My Stream Timer can add minutes onto a timer which is handy when you need to extend the lab time.
The last overlay provides the lower third. I can use this to bring up my name at the bottom of the screen, plus other messages.
Teleprompter
The teleprompter display is also controlled through OBS, but the display is not necessarily the same as the output.
I created a teleprompter scene in OBS containing three sources:
- blank,
- capture of the output monitor,
- and capture of the video-conferencing application.
A full-screen projector projects this scene (not the current view) to the teleprompter. Buttons on the Stream Deck control which of the sources are visible.
The sources will need to be inverted, or mirrored, in some way (depending on how the display in the teleprompter is oriented) for them to appear the correct way around in the two-way mirror, and this can be done in OBS.
You might need to do some tweaking to ensure that the VCA is captured. For example, with Zoom, the video settings need to be changed so that the video rendering method is GDI. If I had a dedicated monitor for the VCA, then I don’t think I would need to make any changes here.
Summary
Every instructor’s OBS setup is likely to look different, but some common techniques, such as picture-in-picture, can be applied for most instructors. This post presented some ideas based on my current setup. Ask me in a couple of months, and it will probably have changed again.